Filter by Topic:
Posted by Bethan Bithell on Jan 30, 2021
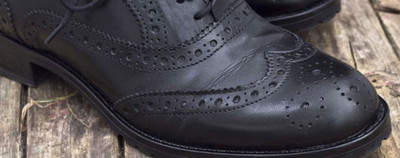
A pair of top quality bench-made brogues, such as the Hoggs of Fife Prestwick or Glengarry are a timeless edition to your wardrobe and will last for many years.
Originating in the British Isles, the traditional brogue featured holes punched through the leather which served to allow water to seep out. This made them the practical choice for the boggy grounds of Scotland and Ireland.
Brogues have come along way from their humble origins, now the choice shoe for the office, formal functions and parties.
Hoggs Footwear

Hoggs bench-made brogues are handmade and carefully crafted in Northampton using traditional methods to ensure the highest quality, intricately designed and made footwear. Hoggs brogues feature a leather lining - this acts as a second skin making them very comfortable and durable.
Brogues can offer comfort, style and practicality but they, like any other well-made shoe, require leather care and attention to keep them at their best. Therefore, it is essential to maintain your boots and shoes to ensure many years of enjoyment. Read 5 Reasons You Should Wax Your Leather Boots.
How to look after leather brogue shoes
Listed below are the tools needed and a step by step guide on how to keep your brogues at their best.
Tools for the job:
- Two Boot/Shoe Brushes (or soft cloth if you prefer)
- A pair of Shoe Trees (or newspaper - and extra newspaper for protecting the floor)
- Leather Conditioner such as Hoggs of Fife Leather Balm
- Wax Polish
- A damp Cloth
- Toothpicks
- An old toothbrush
- Or buy everything in one go - Punch Shoe Polish Kit
Step by step guide to achieve best results
Step 1 - Clean:
- Remove the laces so you can reach all parts of the shoe
- Using a damp cloth or brush, clean the shoes, paying particular attention to removing dirt and salt from within the lace holes and indentations (use a toothpick if necessary)
- Once dry, use shoe trees to hold shape and offer support (or alternatively use dry newspaper.
Handy tips:
- Use an old toothbrush to clean around the welts (strip of leather/rubber that runs along the perimeter of the outer sole)
- If the shoes are damp, place newspaper in to draw moisture out.
Step 2 - Condition:
- Ensure shoes are completely dry before treating
- Apply leather conditioner to the shoes - use circular motions to work into the leather
- Allow the conditioner to work into the leather for approximately 30 minutes
- Remove any excess product with a dry cloth.
Handy tips:
- Leather conditioners are great for softening stiff shoes (usually a result of leather drying out)
- Applying conditioner to the leather should not change the appearance of the shoes (although a test on an inconspicuous area should be carried out first)
- Don’t worry if some of the product goes into the holes - this can be removed later on
Step 3 - Polish:
- Apply wax polish to the shoes to ‘revive’ the leather - wax acts as a water repellent to protect the shoes
- Apply in circular motions, ensuring you do not use too much product as it will not sink in and will go to waste
- Allow wax polish to seep into the leather for at least a couple of hours, before ‘buffing up’.
Handy tips:
- Wax may discolour the shoes as it seeps into the leather so always test a small unobtrusive area first
- Concentrate on the front and back of the shoes, as these areas get the most wear
- If you find conditioner and wax has got into the holes, remove with a toothpick.
Step 4 - Finishing Touches:

- Once the Wax or Polish has worked into the leather (approx. 2 hours minimum or over night if more convenient), buff to a shine using a soft shoe brush or cotton cloth
- Polish briskly to get a glossy shine!
Handy tips:
- Always allow the shoes to dry fully before wearing (use the newspaper in the shoe trick if in doubt!).
Some points to remember:
The key factors to remember are:
- Allow your brogue shoes to dry out fully before cleaning and protecting them
- Try not to wear the same pair of shoes day in, day out
- Test a small section before applying wax to check for colour change
- Clean the brogue’s leather holes and indentations with a toothpick
- Buff with a clean cloth to achieve a glossy shine.
Look and feel stylish and comfortable in your brogues – look after them and they’ll certainly look after you. Enjoy!
Click here to shop our full range of Brogue boots and shoes
RELATED ARTICLE - A useful brogue boots and shoes buying guide
Products you may be interested in:
